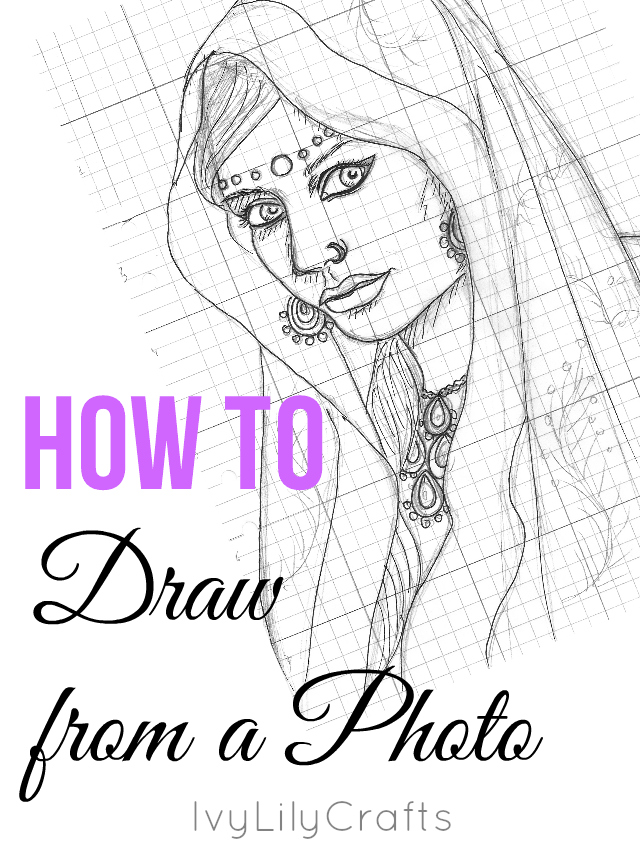
One of the biggest struggles in creating portrait art is getting the proportions right. It doesn't matter if you're great at shading pencil drawings. If the initial proportions are wrong, the likeliness of the person in the portrait will be off. I used to draw portraits completely freehand (examples below), but then I started using a grid for the sketching stage to get better proportions and likeliness and to sketch faster. I think it's a good tool, when you're drawing from a photo.
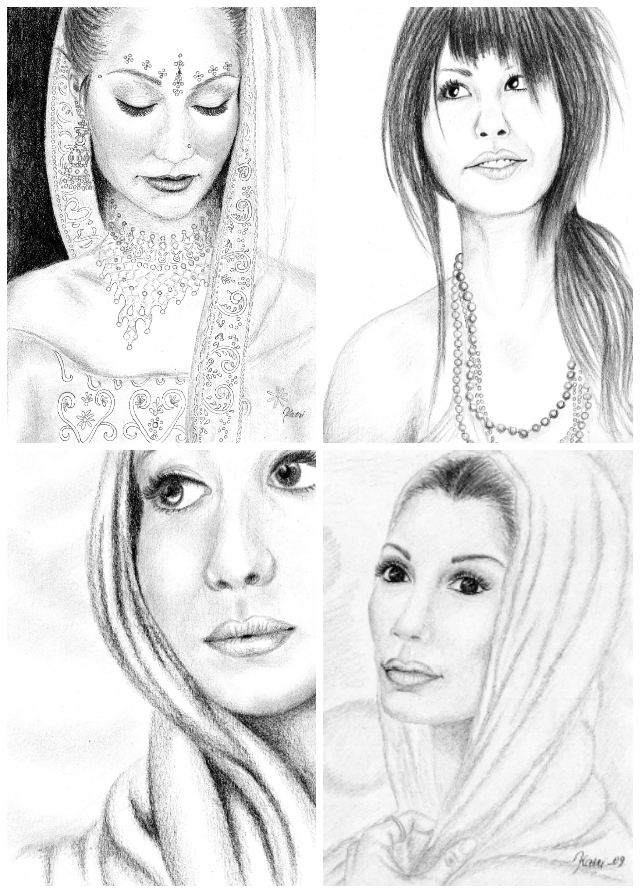
These are some of my freehand pencil portrait drawings from 2009. I think they would've benefited from using a grid.
This acrylic painting and the rest of the artworks in this post were sketched with the help of a grid.
I've executed the grid method in a few different ways. If I have the reference picture printed out, I might draw the grid straight on the picture. If I don't want to ruin the reference picture, I would draw the grid on an overhead projector transparency with a marker and just attach the transparency on the picture. I even used to tape the transparency grid on my computer screen, if I didn't have the image printed out.
A grid made of an overhead projector transparency.
At the moment I only use reference pictures on the computer and don't print them out. I also made a quick video on how I use a grid now. Instead of any of the stuff I wrote in the last paragraph, I make the grid in GIMP (a free image
editor). Then I draw a grid of the same size (same number of rows and columns) on my grid
paper and use the reference photo on screen as a guideline for my
sketch. You can, however, draw the grid in a smaller or bigger scale to fit your paper. You can also number the rows and columns if it helps you. I don't need to erase the grid lines from the paper afterwards, because
I'll transfer the final sketch onto my actual drawing or painting surface.
Grid on a reference photo using GIMP.
How to make a grid in GIMP 2.8.2
Open your reference photo in GIMP.
Set the grid visible: View -> Show grid
Change the dimensions of the grid: Image -> Configure grid -> Spacing -> Set the size you want -> Click OK
Note that the grid you make this way will NOT stay on the photo when you save it, close it
and open it again.
Ennen piirsin muotokuvapiirustuksia ja luonnoksia maalauksia varten
vapaalla kädellä. Mittasuhteista saa kuitenkin paremmat ja luonnoksen
nopeammin valmiiksi käyttäen jotain apuvälinettä, kuten ruudukkoa.
Ruudukon voi piirtää suoraan tulostetulle mallikuvalle. Ruudukon voi
piirtää myös esimerkiksi läpinäkyvälle piirtoheitinkalvolle
kalvotussilla ja asettaa kalvon kuvan päälle. En kuitenkaan yleensä
tulosta mallikuvaa, vaan katson sitä ruudulta, joten ruudukko pitää myös
tehdä koneella. Väliaikaisen ruudukon voi tehdä helposti GIMP:illä.
Seuraavaksi piirrän samanlaisen ruudukon (yhtä monta riviä ja saraketta)
ruutupaperille, jolle teen luonnoksen. Siirrän valmiin luonnoksen
varsinaiselle piirustuspaperille tai maalauspohjalle, joten ruudukkoa ei
tarvitse yrittääkään poistaa.
Ruudukko GIMP 2.8.2:lla
Avaa mallikuva GIMP:issä.
Näytä -> Näytä ruudukko
Kuva -> Määritä ruudukko... -> Välistys -> Aseta haluamasi välistys pikseleinä -> OK
As I've mentioned before, I don't usually draw my sketches for paintings straight onto watercolor paper or canvas. I draw the sketch on a separate paper, where it's easier to erase and clean up the outlines and then transfer the finished sketch onto my painting surface. In this blog post I'll list five different methods to transfer your drawing onto the painting surface. They're all either cheap or completely free. Some require a computer or other technology and some don't. So hopefully, if you're struggling with how to transfer your sketches, one of these methods (or a combination of some of them) will suite your budget and the supplies you already have available. Lyhyesti suomeksi alla.
Having trouble coming up with ideas for art projects, art blog posts or art YouTube channel videos? I've listed 100 (or 101) art video title or topic ideas for YouTube in this post. A lot of them work for blog posts, too. Some of them you can use as ideas for you art projects that you don't even post online. I divided the list into sections: general art video title ideas, art challenges, art tutorials, themed artworks and art series. Some art challenges have many versions of them (3 marker challenge, 2 marker challenge and 1 marker challenge or 10 minute and 30 minute drawing challenge), but I'll just name one of the versions. You can download the list PDF format to save it or print it out.
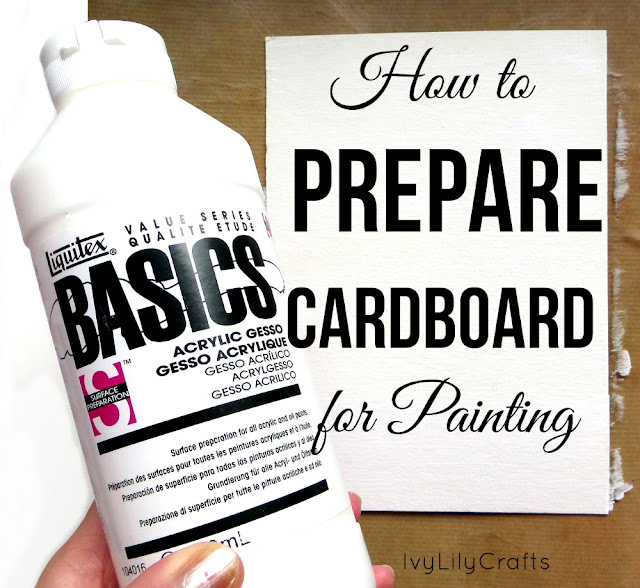
Would you like to paint on cardboard, but have noticed that the paint soaks into and you can't achieve bright colors? I'll show you how to prepare a piece of cardboard for painting with gesso primer. Cardboard works for both acrylic and oil painting and you might sometimes want to use it instead of canvas, board, wood or paper to save money or to be more environmentally friendly.
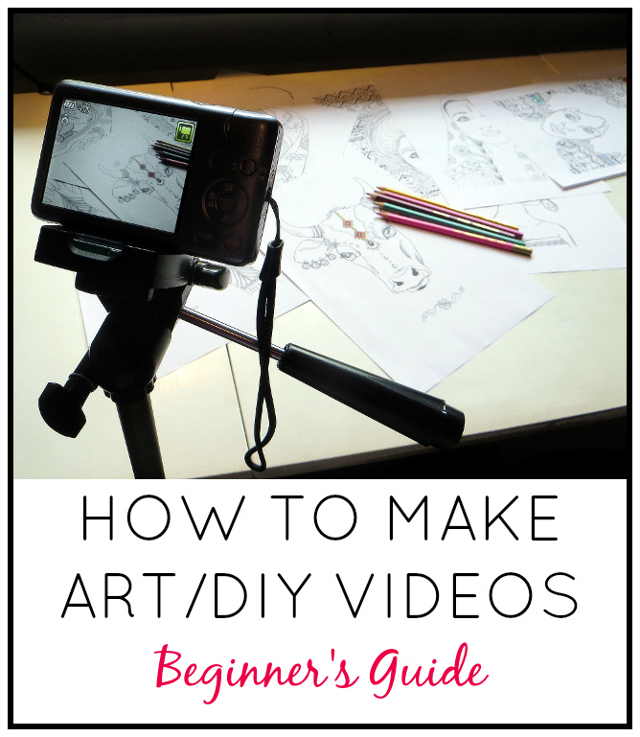
A couple of months before my last birthday, I decided I wanted to start making speed painting videos for You T ube and asked for a tripod for my birthday. My first videos turned out to be travel diaries, because those were a lot easier to film. By now I've also made some DIY tutorial and speed art videos and I thought I'd share how I got started with those by using tools I already had or just cheap or free tools. Why should you start a You T ube channel though, if you already run a craft or art blog? For one thing, it can be a lot more informative to watch video of an art technique or a craft project than just reading and seeing a few work-in-progress photos. Moreover, you can reach a bigger audience with videos than a written blog. My most popular blog post ( Sugar Painting ) has been viewed 2 , 1 00 times (based on Blogger statistics which exaggerate the number of views) while my most popular video has been viewed 8, 7 00 times. (Th is blog p o st was last updated in ...
I made my first printable coloring book in July with ethnic themes (African and Indian Portraits and Patterns) . This time I wanted to make one of Matryoshka dolls, which I love drawing. There's 5 designs and they're all ones I had originally drawn a few years ago, but I fixed them up and added more details. The originals are A4 size ink and marker drawings which I scanned and edited in GIMP (turned black and white, added contrast, erased mistakes), put into a word file and saved as a PDF. And tested that they print correctly. Scroll down to see parts of the process on video and a very basic tutorial on how to color digitally in GIMP. I'm selling the coloring pages in my Etsy shop . I also have a free sample coloring page for you , wh ich you can download by cli cking yellow t he button below . Tein ensimmäisen värityskirjani (afrikkalaisia ja intialaisia muotokuvia) heinäkuussa. Tällä kertaa halusin aiheeksi maatuskanuket, koska niitä on vaan niin haus...


this is helpful.
ReplyDeleteI love the parrot.
Glad to hear that. Thanks!
Delete