How to Create Double Exposure Effect in Photoshop
Want to create a double exposure effect for your art, design or photo, where you'll have a silhouette of one image and another image inside it? I'll show you how to make three different versions of the same artwork or design for your print on demand shop using Photoshop: a silhouette, a double exposure effect combining two images and adding a gradient overlay. You can watch the Photoshop tutorial video or keep reading.
If you don't have Photoshop, you can start a *free 7 day trial, which you can cancel at anytime before the 7 days are up. Adobe also has student discounts and different bundles and offers, which I'll link to below, if you want to buy a Photoshop subscription.
Disclaimer: Links marked with * are affiliate/referral links that let you support the blog / YouTube channel at no extra cost to you, if you make a purchase through them.
Disclaimer: Links marked with * are affiliate/referral links that let you support the blog / YouTube channel at no extra cost to you, if you make a purchase through them.
- *Start Free 7 Day Photoshop Trial
- *Students Save over 60% on Adobe Creative Cloud
- *Start Free 7 Day Creative Cloud Trial
Remove a solid color background
Previously I showed you how to edit your scanned or photographed traditional artwork and how to remove the background. I'll start by showing you an even faster way of removing the background if it's just a plain white or other solid color background.
So, I'm opening my edited moth drawing in Photoshop. It has a solid white background, which we need to remove to turn the moth into a silhouette. Choose the Quick selection tool from the left toolbar. Right click it to open the menu and change to the Magic wand tool. You can change the Tolerance, if the selection isn't perfect.
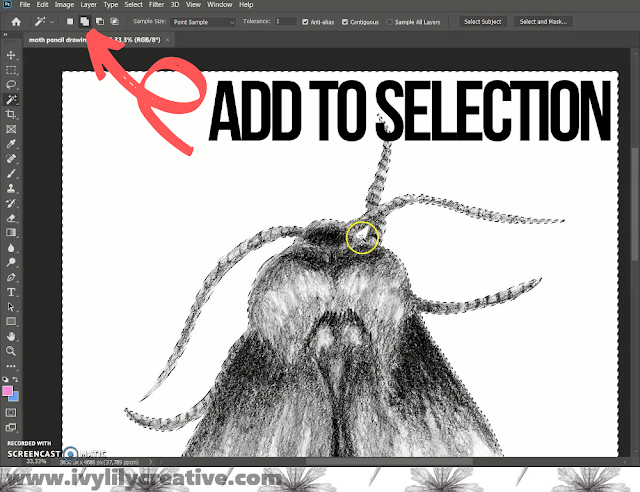
Then click on the background and Photoshop should select the whole background color that's connected to the spot you clicked on. I'm missing a little area between the antennae, so I'll make sure I have the Add to selection option chosen in the top bar and then click that area to add it to the previous selection. If you have a more complicated background to remove, check my blog post on removing backgrounds with Photoshop.
When you're happy with the selection, let's remove the background. To create a transparent layer under the image, right click the image layer in the Layers tab and choose Duplicate layer. Click OK, and then click the eye icon of the bottom layer to hide it. This creates a transparent layer.
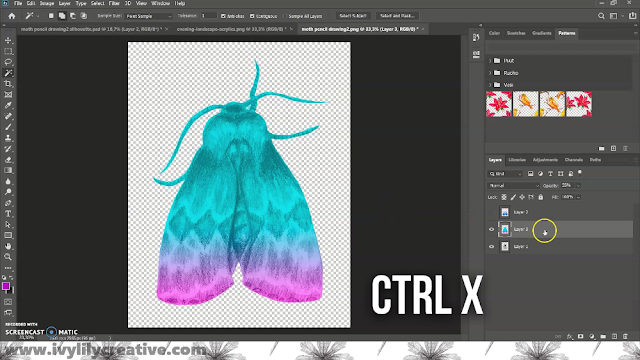
Now, make sure you have the top layer selected and then press Ctrl X to remove the background you selected with the Magic wand tool. You can undo with Ctrl Z, if needed.
To check that there aren't any stray pixels left over, add a new layer from the plus sign on the bottom of the Layers tab. Select a contrasting color in the color picker and then go to Edit - Fill - Background color, since I have the background color set to black in the color picker. So, now I have a black color layer underneath the image and it's easy to zoom in and check that there aren't any white pixels left, where there shouldn't be. Hide the black layer by ticking off the eye icon next to it, when you're done with the black background.
Save this version at File - Save as, as both a PNG, which preserves the transparent background, and as a PSD file, which preserves the different layers for later use in Photoshop.
Make a silhouette
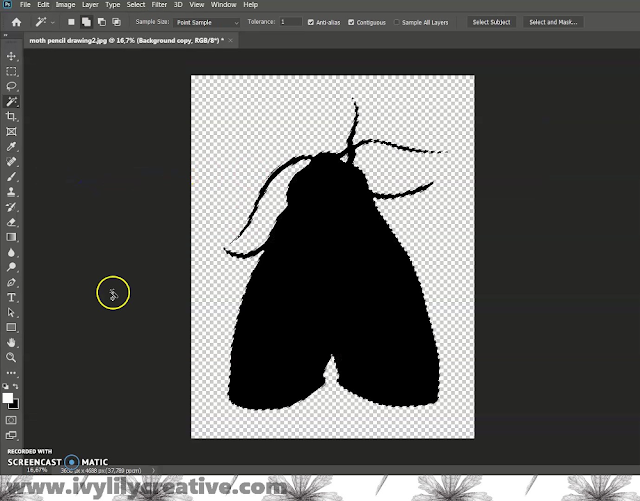
Next let's make the silhouette. Make sure the image layer is selected. Take the Magic wand tool again and click on the transparent background, so you'll have the transparent area selected. Go to Select - Inverse to invert the selection, so you'll have the actual image selected instead of the background.
I already have black selected in the color picker, so I'll go to Edit - Fill - Background color to fill the moth with black. I'll save this silhouette as a PNG.
Create a double exposure effect
Let's do a double exposure effect. Go to File - Open and find the image you want to use. I'll go with a landscape painting. I'll drag it over on top of the moth drawing.
Make sure the top layer is selected in the Layers tab and lower the opacity from the slider, so you can see the other image underneath and then move the top layer so it's covering the whole image underneath.
Select the lower layer and use the Magic wand tool again to select the transparent background.
Select the top layer and press Ctrl X to remove the area that's on top of the transparent background. Now you have a double exposure image and you can play with the opacities of both layers and even erase a part of one of the layers.
I want to fade out the landscape painting so that it's only covering the wings of the moth and I'll do that with the Eraser tool. I'll make it softer and set the size in the top toolbar to large and change the opacity to 100%. I'll erase the part of the landscape that's on top of the head and top half of the moth to reveal the moth drawing underneath and leave a soft transition.
You can make the seam less noticeable by lowering the opacity of the Eraser tool and making a kind of a gradient between the two images.
Create a gradient double exposure effect
You can also do an actual gradient between a color and transparency to achieve a similar effect. If you use gradients for print on demand, keep in mind that they might not print perfectly on fabric.
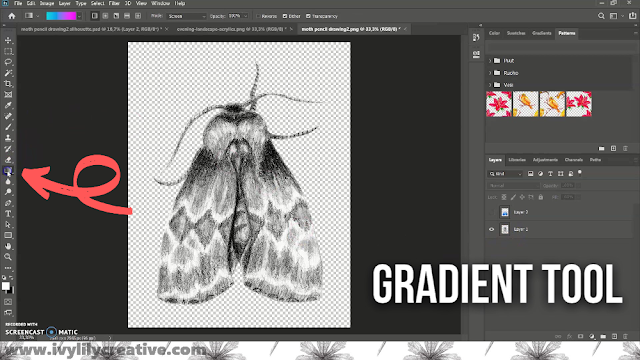
Pick the Gradient from the left toolbar.
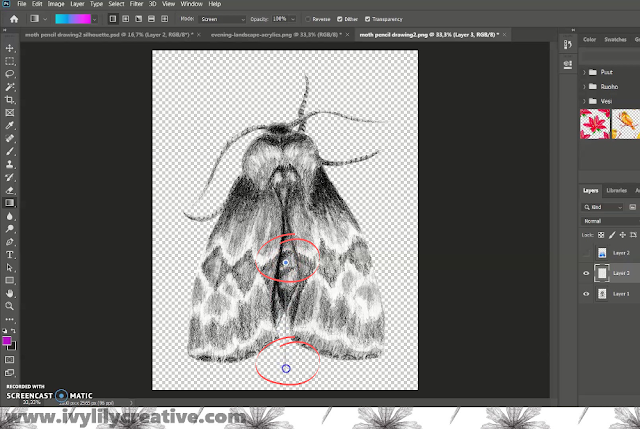
Choose the two colors in the boxes with the color picker or you can use one of the ready made gradients. You can also choose shapes like radial or linear.
Make a new layer from the plus sign below the Layers tab for the gradient. Fill the new layer with the gradient by clicking the start and end points.
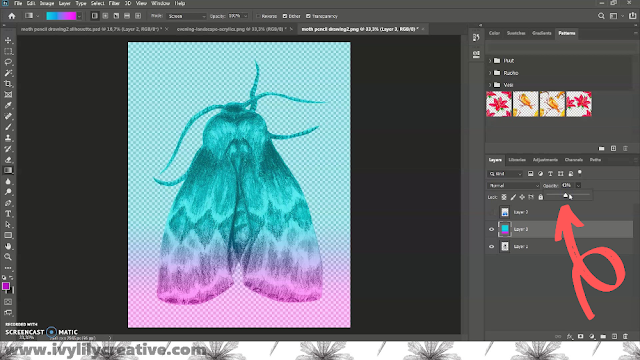
Then lower the opacity of the layer, so you can see the other image underneath. Use the Magic wand tool on the bottom layer to select the transparent background once again.
Then choose the gradient layer and press Ctrl X to remove the background.
Now you're left with the gradient on top of the image. You can play with the opacity and use the Eraser tool again to reveal more of the image underneath. Make sure to save both the PNG and PSD versions.












Comments
Post a Comment